These are the installation instructions for the replacement idler tire used in most of the Nakamichi cassette deck models BX, MR, CR-5 and CR-7.
*** Please read this a few times before attempting the repair. ***
1) Be sure that the machine is NOT plugged into an A.C. power outlet and all the audio cables are unplugged from the rear of the unit.
2) Push eject, opening the cassette door and remove the plastic cassette well
door by gently lifting it up and then toward you.
3) Stand and prop the machine up on it's back giving you easy access to the
front of the deck.
4) Remove
the two screws in the upper corners of the rear metal cassette well plate
with a #1 Phillips screwdriver. NOTE: Only apply enough pressure to grip the
head of the screw and then turn it counter-clockwise or you could bend the
screw’s mount.
5) Carefully remove the plate without bending. NOTE: The plate is keyed into
the two posts, in the lower corners, near the heads.
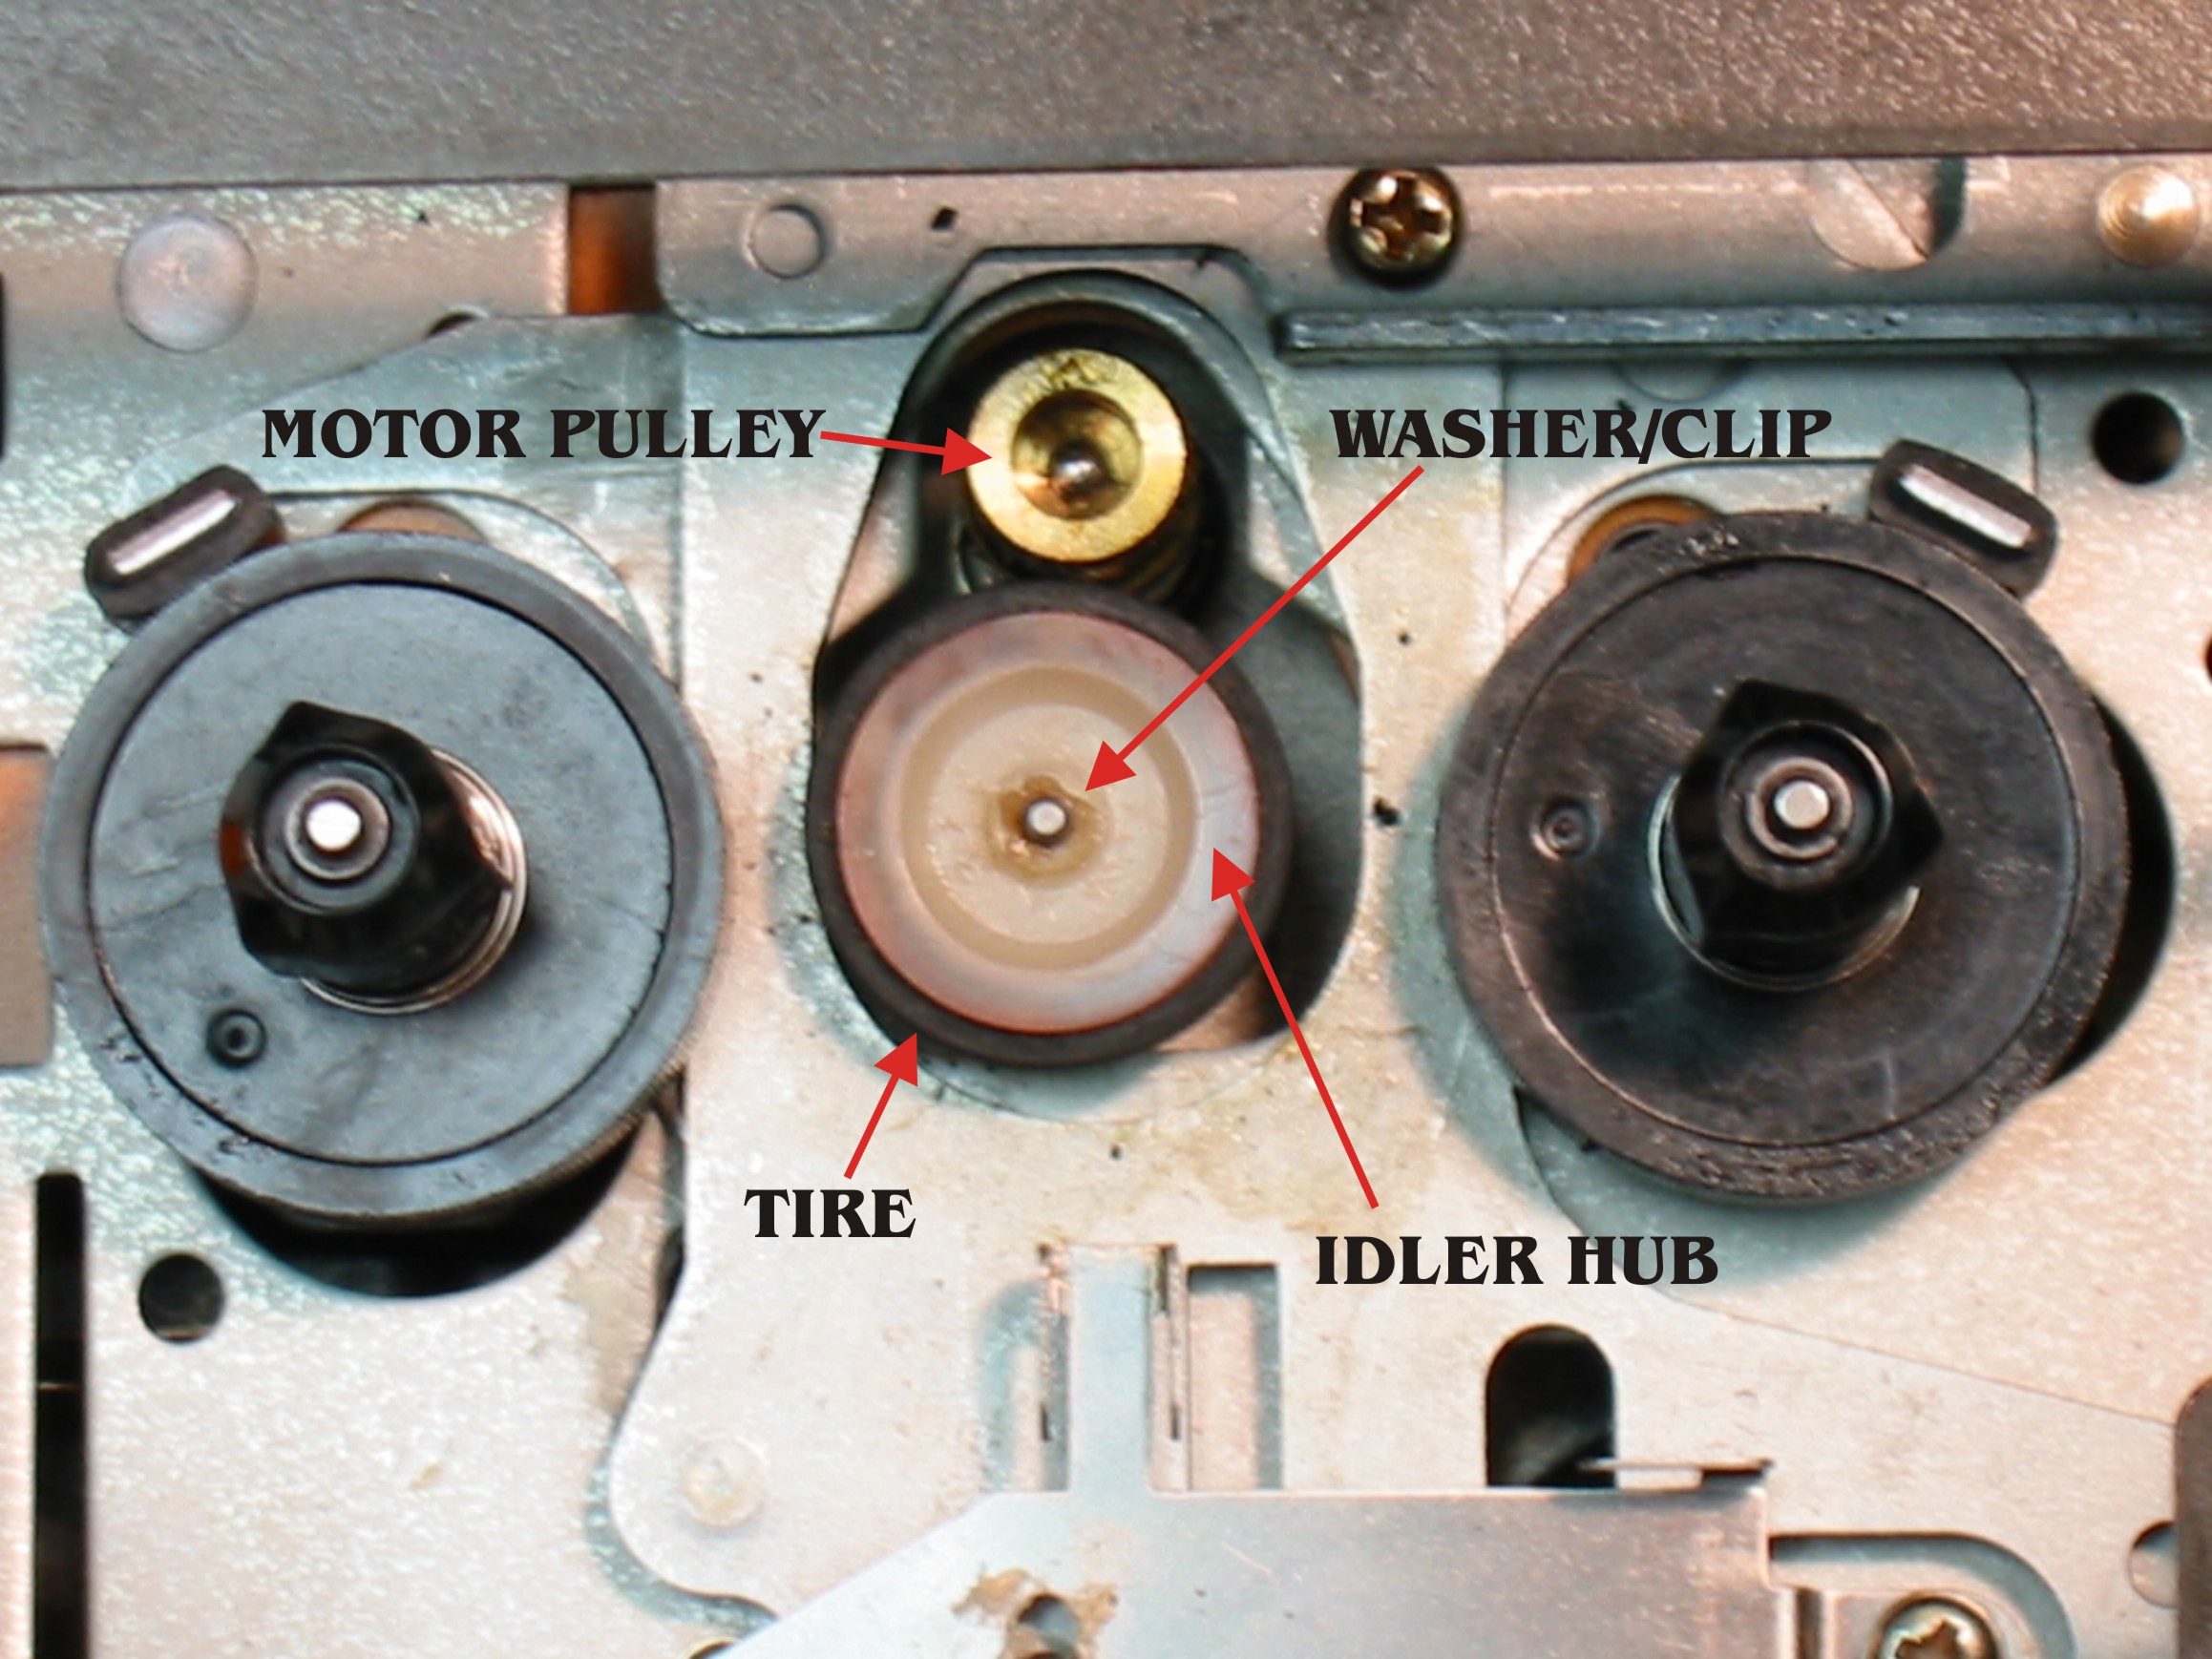
6) Using a small nail clipper or cutting pliers, remove the little milky
white washer that is in the center of the idler hub. NOTE: You must remove the
idler hub to change the tire properly!! NOTE: This washer/clip can be very
easily lost or launched!
7) Lift off the idler hub and watch for a black washer that should be on the
bottom of the shaft. If it comes off with the hub, put it back on shaft.
8) Pinch or roll the old tire off it's hub. Fit the new tire on the hub and
rub around the tire to ensure that it seats evenly on the plastic hub.
9) Re-install the idler hub. Cut a slit in the plastic washer from the center
hole to the outside. This will allow the washer to open-up and easily install.
NOTE: Use clear plastic (Scotch) tape to hold the washer during re-installation
so it does not fall into the machine! WARNING!!
Support the rear of the plastic idler arm and do not apply too much pressure!!
You could break the arm!!
10) Using tape head cleaner and swabs, thoroughly clean the motor pulley and
idler tire surfaces. Scrub the grooves of the reel hubs cleaning off the old
tire residue and don't leave any of the cotton swab on any of the surfaces.
This will ensure the proper tire grip.
11) Re-assemble, noting to key in the lower corners of the metal cassette
well plate. Plug it in to test and ENJOY!
If you are using one of our improved Nakamichi idler tires, it should work reliability for years. If you are not, don't store this information too far away because you will need it again, soon! OUR replacement idler tires come with a 5 year replacement warranty, the shipping and handling charges are excluded.
These instructions are only a guideline. Electronics Service Labs is not responsible for any damage that may be done to machine in changing the tire.
Feel free to contact me if you have any questions.
(Click picture to enlarge)
Sincerely,
Jeff Galin
"Nakamichi Serviced Here" since 1975!
ELECTRONICS SERVICE LABS
1807 Berlin Turnpike
Wethersfield, Connecticut 06109 USA
VOICE & FAX 860-529-3700
Monday to Friday from 8am to 6pm ET